The workshop is too cool for epoxy work, keeping the boat building project on hold.
So, what else am I doing in a cold workshop? Making woodworking “appliances,” working down the to-do list of small projects. Each of these was a fairly small project and done with materials on hand.
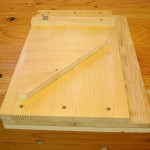
 A shooting board is handy for planing the ends of boards, getting them square. There isn’t a lot of need for anything straight or square in most parts of a boat, but there are other projects that occasionally need a squared up component. No particular plans were used for this shooting board. They are simple enough to not need detailed plans, so I made this one to a size convenient to the material on hand. The material is from some shelving that has been standing unused for a couple of decades, glued up, hard, splintery, Southern yellow pine. The best attributes of this material are that it’s stable and was paid for years ago. The fence is adjustable. I also made an extra board to accommodate miter shooting. While very simple, and made of almost throw away materials, this tool is great fun to use. Splash some alcohol or mineral spirits on the end of a board that needs truing. Then shoot it with that big ole jointer plane. The mass of the plane does the work effortlessly, making that end grain shine with smoothness.
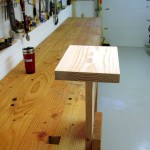
 A carving jack is a device for elevating a work surface to a convenient height for close work. This would have been very handy when I was carving the scrolls on the stems of the Fiddlehead boat. Not having one of these, I used the table of a band saw as a poor substitute. This is a dead simple appliance, a simple “T.” The material was straight from the scrap pile, a couple of pieces so badly cupped and twisted that they were reduced to a mere image of their former selves to correct the defects. To get a little bit of new practice, I used a mortise and tenon with a doubled tenon, fixed firmly with wedged tenons. The mortises were fabulously clean (in comparison to previous work like this). My tenons were rough sawn and then trimmed to fit. Before someone asks (someone always does), yes, that’s a glue line on the end of the table piece. Yep, busted it while fitting the tenons. Yep, threw the busted parts back on the scrap pile. Yep, used a few choice words. Yep, sat for about 2 1/2 minutes in the moaning chair, then, glued the broken part back together and completed the fitting the next morning. Since this picture, it has been soaking up my standard finish for shop tools, BLO.
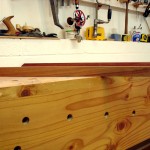
 Winding sticks are useful for detecting a twisted, or “wound,” board. The length of the sticks amplify the distortion, making it easy to know what area to correct. I do enough milling of rough lumber to make these frequently useful. They are made of Madrone, a hardwood that has a pink cast with some deep maroon streaks. I originally intended it for another purpose and wasn’t satisfied with how that project worked out, so I set the remainder aside. These sticks seem a very good use for the remnant. A little bit of time ripping and planing is all it took to make these. Planing with the long #7 (That’s a “jointer,” Jeff.) produced the true top and bottom edges. A few features, gleaned from Rob Rozaieski and Tom Fidgen, make them easy to use. First, one is stained darker to afford some contrast between them. Next, the bevels denote the “this side up” edge of the sticks. Lastly, the holes in the ends serve both to give them the same orientation and to provide a way to hang them from the shaker pegs on the back wall of the shop. Finish is BLO.
Three mini-projects done, and it’s still cold.
Highly recommended: Watch Rob Rozaieki’s episode about “Hand Tool Appliances” over at his Logan Cabinet Shoppe blog.
Very nicely done Bob, if I do say so myself ;)!