Stuff accumulates! … and when not organized, gets lost.
Then, we have to play Beethoven’s “Rage over a Lost Penny” while looking for the lost thing. This happened once again recently while looking for a misplaced lathe tool. So, let’s corral the things into a more confined space.
No, not the turning tools; I made a rack similar to my carving tools racks for the turning tools. It’s all the rest of the stuff, the chucks, drives, tailpieces, plates, mandrels, etc. that has scattered itself all around the shop. After rounding up all the pieces and laying them out in “these things are like those things” manner, I decided I wanted a three drawer tool chest, or maybe one with two drawers and a flip-up lid.
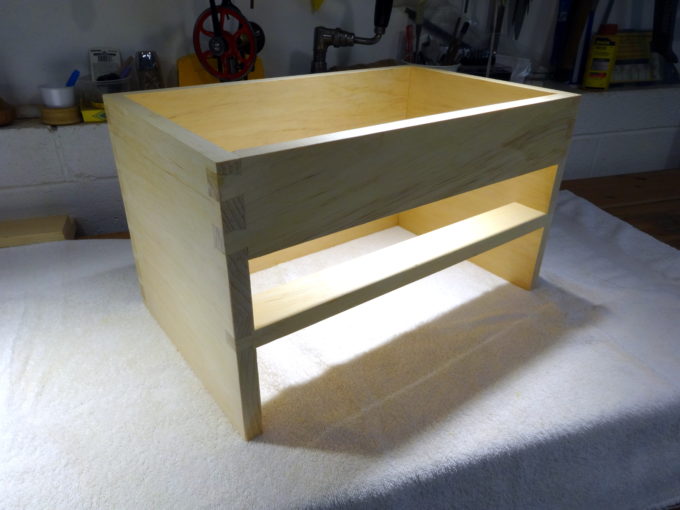 The Paul Sellers tool chest looked like a good choice, so that’s my current Work in Progress (WIP). Mine is a version sized to what I want, a bit smaller than the Sellers version, but constructed the same. So far, the raw carcass is done and I’m working on the top and bottom panels.
Helpers
Furniture building is not my strength. Rarely do I do case work or drawers. For infrequent operations, I’ll gladly use “helpers,” some might say “training wheels,” to get a better result than what comes from random hacking. Here are three helpers that I learned about from following Paul Sellers.
Dovetail helper
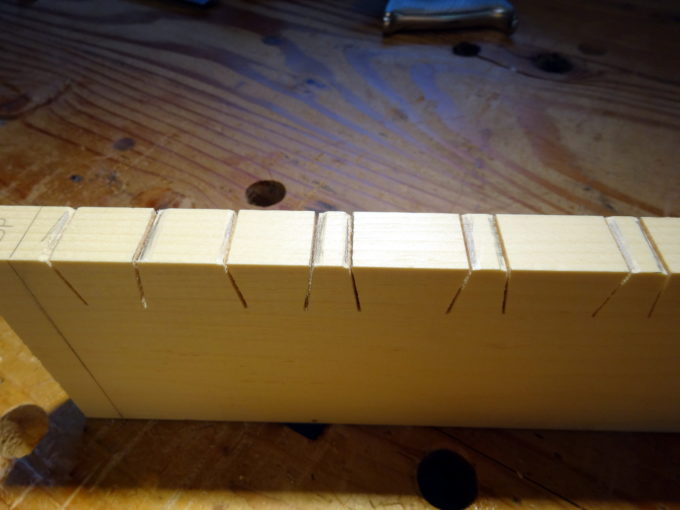
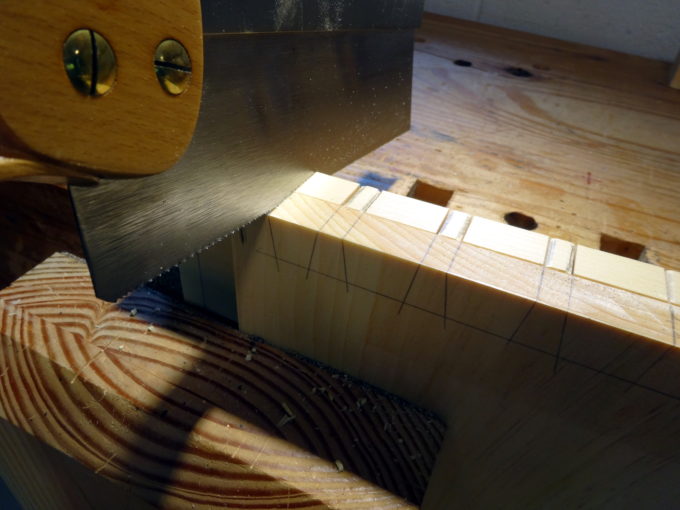
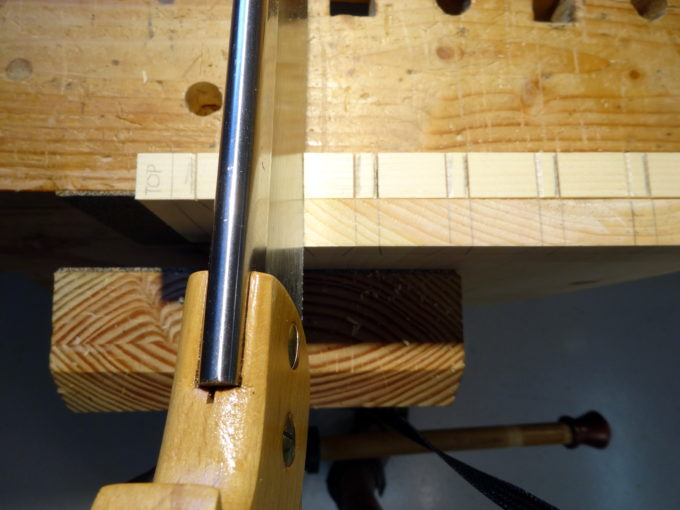
Cutting dovetails is not a daily occurrence for me. I’ve done enough to feel confident and become almost accurate enough. Yet, they are still infrequent, and if a simple guide helps, I’ll readily use it. Yes, all the accuracy is in making dead-square cuts. Here’s a very simple guide. Doubling the thickness of the cut makes it easier to cut square. Adding some guide cuts for nudging the saw in the right direction adds even more accuracy. This carcass has more dovetails than I’ve yet done on a single piece. Using this guide, I got my “best yet” dovetail results.
Mortise helper
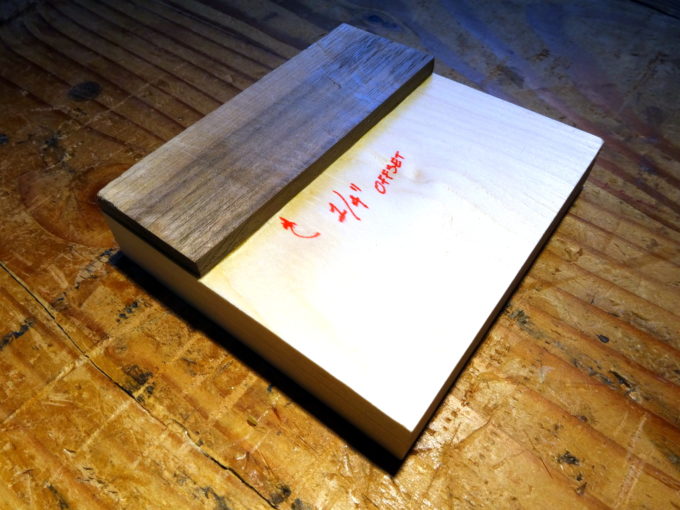
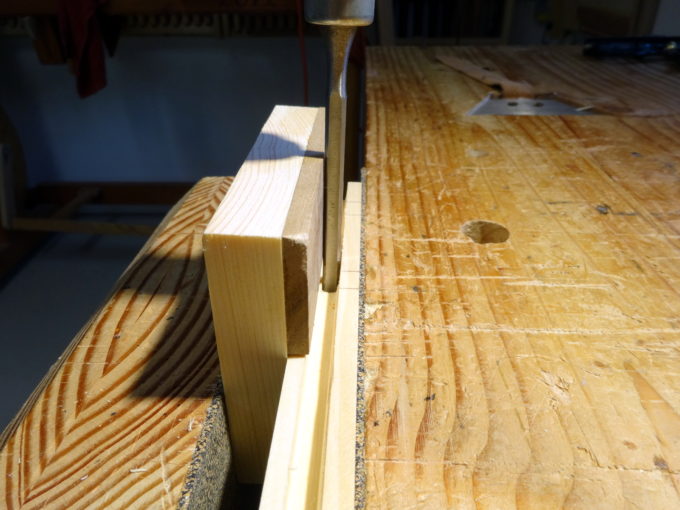
The top and bottom of the chest uses famed panel construction. The rails for the frame are grooved (1/4 inch groove, 3/8 inch deep). Then they are joined with mortise and tenon joinery. M&T is yet another infrequent activity for me. So far, all of my M&T joinery is still together, although if someone were to rip it apart, the innards would be found ugly. Here is a very simple mortise guide that assures the mortise walls remain parallel with the work piece, essentially removing unwanted twist from an assembled panel.
Tenon helper
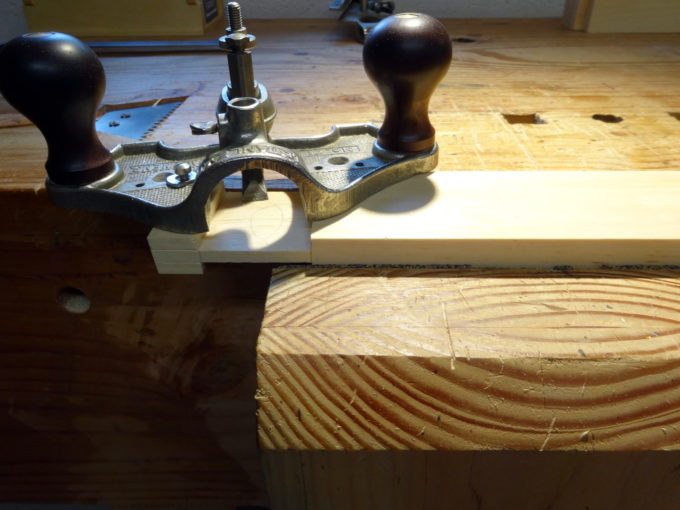 Long ago, I learned to use a router plane as the last step in making well cut tenons. Yet, there’s always the possibility of having the far end of the tenon be cut too small from having the router hanging off in space while cutting. This helper technique eliminates that problem. Use an over-long piece of wood and leave a “tail” as a platform for the other side of the router. Bingo! A nicely uniform tenon. Then, cut off the tail when cutting the tenon to exact length.
For a refined version of these M&T helpers, Paul combines them in his latest video series. If you’re a subscriber, see episode 8 of the Blanket Chest. In constructing the lid, frame and panel construction, Paul cuts tenons on one frame piece using the tenon helper technique. On that same piece, he cuts an extension, which when cut off becomes the perfectly matched mortise guide. This approach cleverly gets the joinery sized so nicely that the frame comes together with no twist and smoothly joined surfaces. (Frame and panel pictures next time.)
Your mortise helper might have some benefits and moreso if you place the stock directly on the bench and the helper is placed in the vise, clamping the stock to it. It’s always advantageous to chop onto solid matter and not onto air.
Thanks for the interest, Potomacker.
Yes, chopping into the solid bench would be better ***IF*** the mortise were more substantial. These mortises are only 1/4 inch wide and the wood is soft pine. And, the recently rebuilt vise is plenty strong enough for this kind of work.