 A thin
 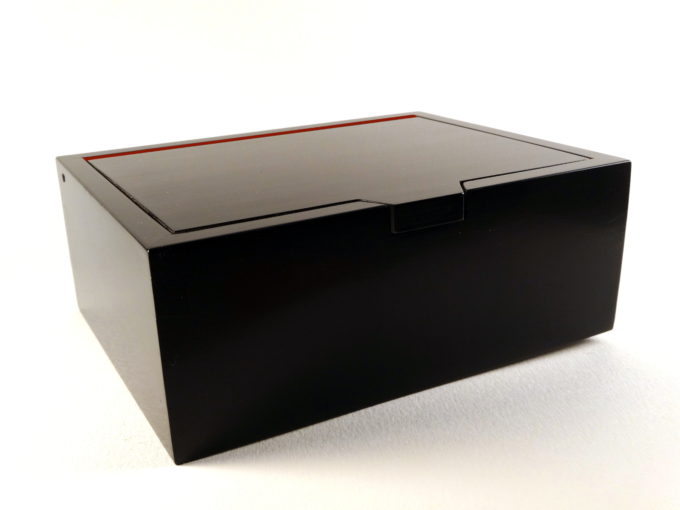 sliver of red teases from the back edge of the lid, like the sole of a Christian Louboutin shoe.
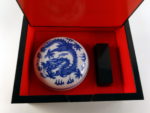
Eva, my wife, is a linguist and language fanatic. One of her language partners, who lives near Beijing, bestowed on her an honorary Chinese name. It is the pseudonym of a premier Chinese poet he admires, Yi’an Jushi. A reasonable translation is “Amiable Calm.” He also sent a Chinese “seal,” a stamp that embodies the two characters of the name in a traditional form.
Something as nice as that Chinese seal deserves a nice box to live in. And of course, it wants to have a traditional black and red Chinese lacquer finish.
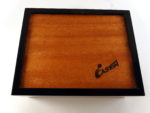
Cherry with mitered dovetails and flip lid,
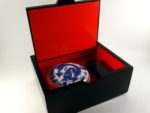
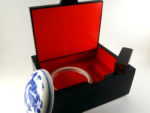
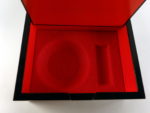
“French fitted” interior,
Dimensions: 6 3/4 inches (L), 5 1/4 inches (W), 2 5/8 inch deep,
Bottom: 1/8 inch mahogany,
Finish: Red lacquer interior, Black lacquer exterior.
This box includes a “French fitted” interior to hold a seal and dish containing an ink pad.
The mitered dovetailed corner, as shown in an older post, offers the traditional dovetail join, but with miters on the ends which provide a much nicer finished appearance when seen from the top or bottom of the box. The miters also allow the groove for the floor to be routed straight through but also be concealed.
Unlike my other boxes, there’s no external carving on this box. The only thing that can be considered carving is hollowing out some spaces in an interior block to create the French fitting. By the way, the fabric for the fitting is simple red felt attached with rubber cement adhesive. The porcelain dish is an “upgrade” from the plastic box that originally held the stamp pad.
Beware! – Lacquer Lessons
It’s called “tuition.”
Finishing this box was an adventure. I really wanted a lacquer finish, and eventually got one. The first challenge was finding actual lacquer. Thanks (mostly) to California regulators, we no longer have true, hard, extremely durable lacquer made of nitrocellulose. There’s a close substitute in the auto industry, but I wasn’t ready to buy auto finish in gallon quantities, and I don’t have a professional spray booth to use it in. I settled for some rattle-can pseudo lacquers meant for model cars. The one trait these pseudo lacquers share with the real stuff is sensitivity to humidity … and New York summers have plenty of that. I was constantly checking weather charts to find afternoons with less than 50% humidity.
The bigger lessons weren’t about humidity, but…
- As hard as lacquer seems, it is still susceptible until very well cured. I painted the inside, red, parts first and then the black outside. (Yes, I used the usual blue painter’s tape.) After painting both, I let the parts sit for about a week. I parked the lid, which at most weigh no more than two ounces on a group of painters’ points, those nice little plastic pyramids. At the time, the red paint was probably a week old. Coming back at the end of week resting on the points, I found dimples in the red finish. Most would “rub out,” but there were other reasons for redoing the red. …
- Somewhere way down the page about 3M’s blue painters’ tape is mention that the adhesive in that tape sometimes interacts with lacquer. I found out after removing blue tape masking and finding a residue that could not be removed. None of the magic potions I tried touched the stuff. Scraping was the only thing that worked, and of course did enough damage to require re-painting the red. 3M’s suggested prevention is to use their Green painters’ tape, product #2060, and to remove tape as quickly as possible. The #2060 product recommends 3 days max.
After those lessons, completing the finish was a matter of hand rubbing. I found that either of these processes worked equally well:
- let the last coat cure until the distinctive lacquer smell disappears (about 1 week)
- gently sand with 400 to remove nibs
- work through the abrasive pads 500, 1000, 2000, 4000
- wax and buff
OR…
- let the last coat cure until the distinctive lacquer smell disappears (about 1 week)
- gently sand with 400 to remove nibs
- rub with a pumice slurry, down to an even satin sheen (abt 500 grit)
- rub with rottenstone slurry until shiny (abt 2000 grit)
- buff clean
- wax and buff
Click any of these images for a larger view.
This is Box #18
Nicely done Bob. Is that a new brand on the box?
Thanks Ralph.
I’ve used that same signature/logo/brand for decades, usually in ink. Now, I have a burning iron for it.
Elegant and exotic with a hint of mystery. Very nice! Also perfectly befitting of the items it holds.
I like that you left the mahogany bottom unpainted. A nice visual reward for those willing to look.
Thanks Greg.
WOW!!!!
For the story and the box! It’s a very nice one.
Thanks for the free lesson!
Thank Antonio.
Looking good, Bob. I don’t see any dovetail outlines, so I guess the mitered dovetails are mitered all the way top to bottom to completely hide them. I saw in your old box that just the top and bottom tails/pins were mitered. I’m sure it was an interesting lesson in layout.
Hi Matt,
Thanks. These were some of the best dovetails I’ve done. They came together smoothly “right off the saw.” And, no, they’re not at all hidden. Only about 3/8 ” at the top and bottom is mitered. The rest is standard dovetail.
The dovetails virtually disappear under very careful finishing. I wanted that classic Chinese appearance and got it using a dozen or so coats of lacquer with lots of hand rubbing in between.
Matt Kinney, of Fine Woodworking demonstrates the mitered dovetail technique in the second of his “Two Ways to Build a Box” videos.