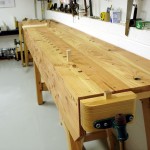
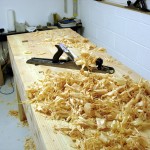
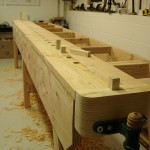
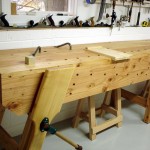
 My extra long “English” workbench is done. The plan came form Christopher Schwarz’s excellent “Workbenches from Design & Theory to Construction & Use.” I lengthened it to accommodate the longer workpieces commonly found in boat building. It is 12 feet long and 2 feet wide.
Although made of common construction lumber (aka rather ugly Douglas fir), and with a thin top compared to some cabinet builders benches, it ends up being rock solid. While contemplating extending the length, I asked Chris if he thought a third set of legs would be needed. He suggested they wouldn’t hurt and pointed out a photo in his book of a bench with three sets of legs. I took a cautious approach and made the center legs a fraction of an inch short. The last thing I wanted was a teeter-tottering bench. Well, there’s no teeter-totter, and not much we can do to make those legs touch the floor. Maybe if I plop my truck engine on the bench? This is what they invented wedges for, isn’t it!
The Gramercy holdfasts from “Tools for Wood Working” work very well. They do need a top thicker than what I used. So, like I did for the dogs, I added doubling blocks under the holdfast locations. They’re great tools at an attractive price.
All of the lumber dimensioning and most all of the fitting and construction was done with hand tools. The only things I used electrons for were:
- My old $10 hand drill helped with the large holes for the lead screws for the vises. As an aside, this is an amazing drill. It was a “no name” metal bodied $9.95 special in the early 1960s. I’ve used it almost continuously since them for the usual DIY stuff. It has outlasted two cordless drills and shows no signs of giving up.
- I used the band saw to nibble away the waste near the curved areas of both vise faces.
- A semi-retired miniature lathe and some idle mahogany were used for the ends of the vise handles.
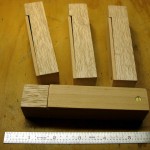
Building the bench offered a few really interesting techniques: the use of Miller dowels for fastening the top (no metal to catch a plane while flattening), the use of drawboring to really tighten up a mortise and tenon joint, and the use of a wedged tenon for the parallel guide at the bottom of the face vice. Each technique was easy to learn, thanks to well written instructions, and each produces very strong joints.
Two coats of boiled linseed oil provide enough finish to keep blood from soaking into the top. Don’t ask how I know that.
Once upon a time (dead link now): “approved by the Schwartz.”
Now, back to boat building.
