 It’s been a long road. My serious woodworking interests started when I came through the door marked “small boats.” Since then, I’ve passed through many doors, each offering new interests and challenges. None included or required dovetail joinery. Until now… That’s one reason why I have been rehabilitating saws lately.
Oh yes, carving still holds my main interest, but carvings need a purpose. Not being one to construct elaborately carved furniture, 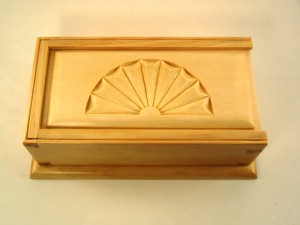 I find smaller forms more appealing. Hence, the boxes. But… dovetails? Really? (You know, small boats have neither straight lines nor square joins … nor dovetails.) OK. OK.
I’m learning from yet another master. Paul Sellers is in the midst of a boxmaking series at his Woodworking Masterclasses online school. While I find his classes excellent, Paul is one who always produces perfect results. So rare are his mistakes that he seldom advises how to correct them. 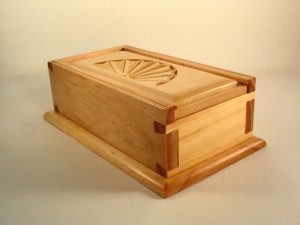 My learning comes more from (alright, mostly … maybe totally) making mistakes and learning how to fix / avoid them, and I’ve learned over the past weeks that there are elebenty-seven different ways to ruin a dovetail joint. (Nope, no pictures!)
Without further jabbering, here’s the first dovetailed and carved box that’s worth showing:
Body: 4″ by 7 1/2″ by 2 1/4″
Base: 3/8″ larger all around
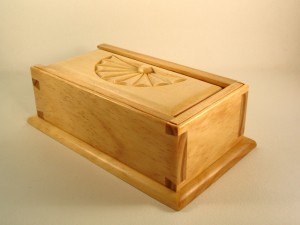
Body: New Zealand pine
Lid: Wisconsin basswood
Finish: Shellac and paste wax
It is similar to the example Sellers has been teaching, but I’ve made it my own with the carved lid. There are a couple of other variances too. Sellers cuts the groves for the lid with a tenon saw. That results in a grove that goes all the way through the end of the box and then needs tedious fitting of plugs to close the holes.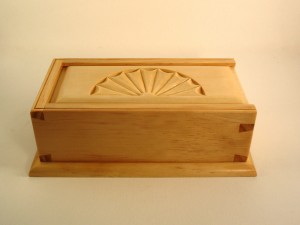 I made mine a stopped groove, like a stopped dado. This one I cut with only a chisel and knife, an experience I won’t repeat. More learning. A Record 044 just arrived from Patrick Leach in today’s mail.
Sellers also cuts the rebates on the lid (for the slides) with a tenon saw. I cut mine with an ancient Stanley #78 moving fillister plane that I call Mr. Fussy. It does the job, but takes about 4 times longer to set up than just using a saw. Doh! Yet more learning.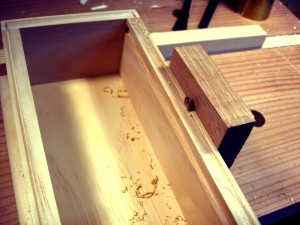
One of the last little bits of learning with this project was creating the beading on the top edge. Some time ago, I did beading on the lathe’s timbers with a scratch stock. An even simpler tool, smaller too, produces results faster. Another bit of Seller’s wisdom is a simple screw in a block of wood. The crisp edge of a single slot screw makes a great cutter. Then, hit the outside corner with a light chamfer. Fast. Easy.
The box collector in our household has already claimed this one.
As an aside, there’s an assembly error (yikes, another mistake) in this box. I mistakenly rotated the low end piece 180 degrees when gluing the box together … and it fit!
Hi Bob,
Nice looking box and I agree that Paul makes everything seemingly with no effort at all. Any pics on how you did the carving? I would be interested in trying something like this. Is it too much of a project as a first ever never done carving before?
Hi Ralph,
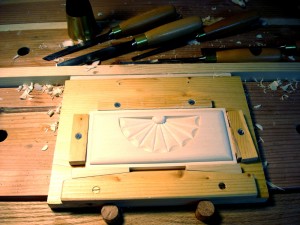
There’s only one picture of the carving. There are way too many steps involved in a carving for me to bother taking pictures. This one is a very simple one, and one that I’ve done several times before. It was more a quick proof of concept than the kinds of carvings I intend to do more of.
You can learn how to do this particular carving from Mike Henderson’s tutorial on the WK Fine Tools site.
For more serious carving lessons, learn from another master, Mary May at her online School of Traditional Woodcarving. I can’t recommend her highly enough.
Be careful with the snow this weekend. Stay home.
It’s fun seeing the various versions of the Sellers’ boxes that we are producing. Yours Ralph’s and mine are very different. I like all three.
The thing I really like about this exercise is you don’t have to concerned about trying new techniques because you don’t have that much invested in time or money. I’m OK with the dovetails, but found it very challenging to hold my plow plane perpendicular, so careful inspection shows by grooves to be somewhat off kilter. I was reading on the Lee Valley site today that you should install an auxiliary fence if at all possible and, for me to get it right on half inch stock, it’s almost a necessity.
The carving really sets your box off nicely. I still don’t understand how glueing the bottom on is OK, but Paul is generally right so it must be OK.
Thanks for the comments Andy. Would like to see your work too.
On gluing … it’s a simple matter of physics. Test what it takes to break a glue bond. How many pounds of force, or foot ponds of energy? There’s no way possible to put that much weight or force in one of these little boxes, not even a hundredth of what it takes to break the bond.
Bob, really nice work on the box!
I’ve made two of the “Shaker candle boxes” ala Paul Sellers. They are fun projects, and I haven’t had any problem with gluing the bottom on although it strikes me as “wrong”. I think the about of movement in a piece the width of the bottom just doesn’t amount to enough to cause problems. I just looked at a wood movement calculator, and in pine 4″ wide with a 30% change in ambient humidity the change in width would be .03″ to .05″ (depending on grain orientation – radial vs flat sawn). With a 10% change in humidity it would only be .01″ to .02″. Finish probably reduces that a bunch.
Thanks Joe!
Now, the wood movement calculation reminds me of my favorite woodcarving artisan, Mary May, talking about “the engineers” who arrive in her classes. Her work is all about creating art, and the engineers show up with micrometers, worrying about whether they have exactly the right gouges, asking if the curvature of gouges for brand x is different than that for brand z, loaded with questions about precision that don’t matter one wit to creating a successful carving. (Being a former software enginerd, I hear her comments in a self-referential way.)
“The Schwarz” has done us few favors by emphasizing wood movement so strongly. It’s a little box and it won’t explode from wood movement. (ahem… physics is a lot more forgiving than software engineering.)
To your precise point, Paul Sellers has an answer. Members of his Masterclasses site can find that answer in a discussion thread. For non-members, the answer is basically “don’t worry about it for things narrower than 6 inches.”
The first time I saw the screw used to scribe a line was 3 weeks ago at ” Woodworking in the 18th Century” at Williamsburg. Apparently it’s a pretty old trick. LOL
Hi Peter.
Oh yes, it is an old trick. Paul Sellers demonstrated it in one of his videos recently but made sure to say he didn’t invent it, that it had been around for a very long time.
Paul Sellers has been doing this for half a century guys. To expect a facility nearing his would be ridiculous.
I can say that having watched his videos many, many times, they are SO packed with knowledge that you will miss so many small details watching it the first time (first FEW times) since you are focusing on the major concepts. But as you practice EXACTLY what he is saying, and then practice some more, and then go back and re-watch them, you will pick up on those tiny details you previously missed, and your joints will show the results. I rewatch them several times a year.
A few keys I would focus on are the Knife wall, keeping your chisel AWAY from it for the first few strikes with the mallet. Once they dovetails are cut out, when fine tuning the joint to fit, frequently testing the joint, and testing after EACH substantial cut with the chisel. And starting with perfectly square stock that is FLAT. This I find is the most time consuming when preparing stock by hand with hand tools, but doing this a few times, and you will have a new understanding of what ‘flatwork’ means.