“Bob” is an easy to remember name that’s spelled the same way coming and going. (Mama knew I’d need that.)
BOB can also mean Bench On Bench. There have been a lot of those featured on various blogs lately. We build great workbenches at low heights that are comfortable for planing, but not a lot of other work, then build Bench On Bench accessories to raise the work surface.
Some forms of relief carving have caught my interest and fueled some new ideas. For that work, I certainly need a BOB and the Steve Branam’s version recently caught my attention. While I’m not a furniture builder, don’t need to hold large panels vertically, and will never seek dovetail proficiency, his BOB does promise a good raised work surface and some great work holding possibilities. Steve did a wonderful job with his step-by step description. Follow his lead if you want lots of detail. THANKS Steve!
Here, I note a few differences in both materials and technique, and yet another kind of work holding.
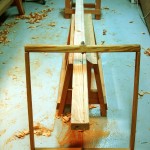
- Steve used nice clear poplar. I used semi-beautiful construction lumber, with the most attractive knots oriented to the bottom side of the bench top. The “butcher-block” laminated top lets one make a thicker top while giving a good bit of choice in hiding small knots. Saw around the big knots and let them drop to the floor.
 My shopmade frame saw made ripping a job that didn’t require knee pads.
- No mid-rip jointing for me. Those ripped edges become the top and bottom surfaces, and I deferred planing them until the top was completely together. Saved wear and tear on the bandanna.
- Instead of veneer press screws, I substituted Joel Moskowitz’s excellent bench screws. The very nice thing about these screws is that the handles can be repositioned once tightened. This avoids the problem of having the handle sticking up in the way of putting chisels to the workpiece. Pull the spring loaded handle out from the screw and rotate it to a more convenient position. Very slick. THANKS Joel. They were easier to fit too; a square nut falls into a simple square mortise.
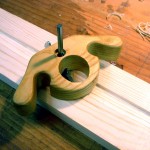
 My I-beams are solid wood, some sort of splintery pine from the on-hand lumber pile, instead of plywood. The dadoes in these offers a tooling problem. What kind of boat building shop is it that doesn’t have a nice narrow rabbet plane? Oh well, I cleared the bottoms of the dadoes with my shopmade router plane.
- The top was laminated in three sections, for reasons we’ll see in a moment. I attached it to the beams before planing the top surface … once again deferring the work that requires a bandanna. Long ago, an oral surgeon charged with removing my 4 wisdom teeth (see why I needed the simple name) asked, “One at a time (4 different sessions and 4 different times for a sore mouth) or all at once?” I chose all at once.
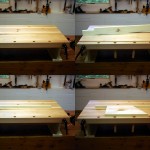
 A BIG THANKS to Bob Bob Rozaieski at The Logan Cabinet Shoppe for his recent post: The Workbench – 1 Year Later. One part of that post shows a “floating planing stop” that was a game changer for me. My intended use for this bench is for holding flat work on top of the bench. Pinching that work between one of these “floating stops” and a couple of dogs will be very very handy. Anticipating work of two general sizes, I incorporated two of these stops in the bench top. Normally, they rest loosely upon the i-beams. Flip one over, and an edge sticks up. Very neat and very easy. See the picture collage as a demo. [We’ll see how well the construction wood vice jaw holds up. It may need a hardwood replacement.]
- Lastly, no scrapers were harmed. This is construction lumber and there’s NO way we’ll get it to look like Donald Trump’s boardroom conference table. Nor, did I use any Avocado (ooops, “Aged Olive”) paint.
The completed bench measures 29″ wide, by 19″ deep and a little over 8″ high. It is tall enough to use the excellent Gramercy holdfasts, and the space between vice screws is just over 24″ (wide enough for holding cabinetry panels – just in case).
You’re welcome, Bob! Looks great! That’s a nifty idea to incorporate Bob Rozaieski’s split top into it.
And I’ll just note that “Retro Avocado” is the very next color on the paint chip card!
Nice idea! I always thought one of these would make a good travel bench for doing joinery demonstrations rather than a full sized portable workbench. The nice thing about these is that they can be thrown in the back seat or trunk of a car, secured to just about anything with a couple of clamps, and you could probably even hand plane small parts (like drawer or box parts) for demonstration purposes. Saves lugging around a big workbench for small demos, since even most portable workbenches aren’t exactly that easy to transport without a pickup or big van.
I love mine. It saves my back when cutting dove tails, chiseling, etc.
In this day and age of dwindling resources, I am pleased to see some woodworkers giving due consideration to bandana conservation. Thank you.