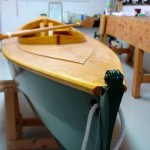
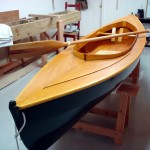
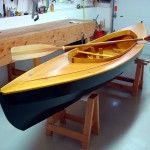
These shots are for the youngster who wanted to see the whole boat, not just the top or bottom. As always, click on any image to see a larger version.
It Isn’t Easy Bein’ Green
Well, actually it is. Here is a fabulous rendition of Kermit’s theme song. Go listen to it; I’ll be here when you get back.
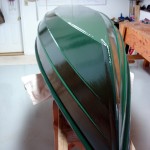 I have often read that you can’t paint a lapstrake boat with a roller. So, I plundered through two coats of primer and the first coat of Kirby’s Bottle Green with a really good brush. A little bit of added Penetrol made brushing easy, but my technique still creates lap marks. Then, I remembered the 4 inch rollers from another project. They work. Yes, you can paint a lapstrake boat with a roller. Just get the right size. Paint the lap edges with a brush and them roll on the rest. Kirby’s paint is fantastic. All the tiny bubbles from rolling gradually disappear with no need for tipping.
Launch day is coming soon. …
Propulsion

Make or buy? Make! On my last trip to the lumber yard, I picked up a very clear western red cedar board, reserving it for a double blade paddle.
What type of double paddle? The modern kayak paddle with asymmetric dihedral blades? They’re ubiquitous, but also look to me like a blob on the end of a long stick. They seem to have a lot of area and I wonder how tiring they are to use. A native paddle with very long narrow blades, like the Greenland paddle I made last year? They need to be far more vertical in the water than normal paddles, and I’m not sure my boat is narrow enough to use them effectively. Or, something in between? I’m a traditionalist kind of fuddy fuddy and found the traditional canoe paddle shape appealing. I took my pattern from Graham Warren and David Gidmark’s book about Canoe Paddles. They have many interesting paddle patterns in the book, but only one for a double paddle, and I liked it.
The end result is 90.5 inches long (230 cm), with blades than measure 21 inches by 5 and 3/4 inches (55 cm x 15 cm), yielding about 105 square inches per paddle, as compared to 115-130 for modern kayak paddles. These blades are longer and narrower than modern kayak blades, but not as long and narrow as Greenland blades. The shaft is 1 and 1/2 by 1 and 1/4 inch, and has a cross section that is egg shaped. The completed paddle weighs 40 ounces, as compared to 33-38 for modern kayak paddles. Both blades are in the same plane, no feathering.
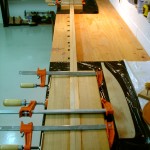 That stick of lumber wasn’t wide enough to make the paddle as one piece. So, I ripped of the shaft (using my handy frame saw), and then cut the remainder into four parts. Those yielded more than enough material for the blades when glued up.
Simple plywood patterns, lofted from the above mentioned book, provide guides for cutting the blades (with my handy bow saw) and for roughing the curved shape of the blade (with my handy Stanley #40 scrub plane).
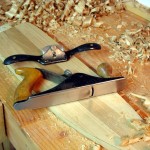 This is a good place to rave about the scrub plane. Christopher Schwarz found it “curious” and decided its best use was for rough trimming the edges of construction lumber instead of ripping them. He wasn’t too keen on using it for reducing a board’s thickness. On the other hand, BobRozaieski was horrified by what it did to his lumber. Unlike either of them, I find the scrub just fine for reducing thickness. It can take out thick, well controlled, shavings. Yes, it leaves a furrowed surface, but that’s easily cleaned up in the next step. I cut the rough curved shape in these blades with the scrub plane in less time than it would have taken to set up and use a resawing technique on the band saw. A spoke shave cleaned up the furrows afterward.
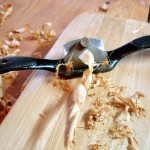 Putting a little bit of spoon dishing into the power face of the paddles was done with those same two tools, the scrub plane and the spoke shave. In this case, using them at an extreme skew and with more blade protrusion than normal allowed for creating concavity. Vintage rounded blade spoke shaves have gotten rare, but I’ll find one some day and make this task easier.
Another of the handy things in Warren and Gidmark’s book is a pattern for a curved sanding block. The french curve shape makes it very easy to sand all sorts of curves. It is especially good at the throat area, where the loom meets the blade. The block is scaled so that a strip cut from the width of a standard sheet of sandpaper fits neatly in the wedged notches. 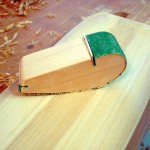 This block is my new best friend for the wearisome work of sanding.
Shaping the shaft is the usual 8 siding, then 16 siding, then sanding shoe-shine style. The only difference here was using an egg shaped pattern rather than a fully symmetrical pattern. It fits the hands very comfortably.
Rough sanding, medium sanding, and fine sanding was followed with four coats of pure tung oil. The first two coats were thinned with mineral spirits for better absorption. The last to used normal strength. By the way, when using pure tung oil be sure to wipe it all off. Don’t leave a wet coat; it will take three eons to dry.  Let the coat sit for 15 minutes. Then, rub it off. Then, buff until dry. Do it again tomorrow.
I have no idea of whether this will be the right paddle for this boat. If not, I can try another variation until I find what works best. Making a paddle is easy, quick, inexpensive, and very satisfying. It’s also a good thing to do while waiting for paint to dry.
Lastly, spread those oily rags out flat until they are completely dry… so dry they are stiff. Otherwise, they can spontaneously combust.
