While Madame Defarge sticks to her knitting, I’m stitching a boat together.
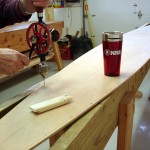 It all starts with cutting up about a quarter mile of copper wire into 4 inch lengths. Then, drill 1/16 inch holes in the bottom every 4 inches, 3/8 inch in from the edge. Next, levitate what the Chesapeake Light Craft folks call the “bilge panel” and other boat builders call the “garboard plank” next to the bottom. Start at the bow. Mark off and drill the first 4 or 5 holes into the garboard plank, matching those in the bottom, and 3/8 inch in from the edge. Insert cooper wires in matching holes and twist. Do 4 or 5 on the other side. Proceed along, a few at a time on the port side, a few at a time on the starboard side, until …
… until discovering that the bottom is longer than the planks. Or, the edges that join are not equal lengths. Drat!!! (Actually, I think there were other words.) By some lofting error as yet undiscovered either the bottom was 3 inches too long (nope, measures exactly to the drawings) or the planks were 3 inches too short (nope, they measure exactly to the drawings). Whatever the cause, the remedy is not making the planks longer, but making the bottom shorter. Yes, unwired both panels, and shortened the bottom at both ends, keeping the lines fair. About 20 minutes work with a block plane.
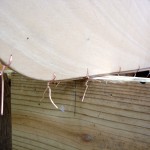 Then, started stitching again. As with all boat planking, there’s lots of contortion going on, and it is best handled by leaving the stitches loose. When the sheer plank is added, the stitches are left even more loose. Stitching up the sheer planks is even more fun than the garboard. It wants to fly off into space on its own. I constrained it by putting a spreader bar at the widest point and by tying the stern ends together with a couple of loops of string. Judicious use of clamps, as props, here and there helped control the chaos, but only slightly.
The instruction manual doesn’t advise one to wear armor, elbow length leather gloves, face masks, and anything else needed to protect oneself from all the wire points. By the time the stitching is done, we have a porcupine. My hands look like I’ve been ripping up bramble bushes. Some people call this construction technique “stitch-n-glue.” Others call it “tortured plywood.” I’m thinkin’ “tortured boatbuilder.”
I thought it might be interesting to have a time lapse video (mostly lapse) of the stitching work so you can see how it comes together.
The next post will show a trick, erm technique, for cutting and fitting the ends of the sheer clamps together.
