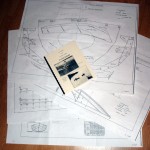
The Fiddlehead is designed to be a very light boat. If built with the lightest recommended materials, the 12 foot boat weighs about 50 pounds. Weight is kept low by using not only lightweight materials such as northern white cedar, but also using very thin materials. The planks are a mere 5/16 inch and the decking and covering boards thinner yet at 3/16 inch.
The Fiddlehead designer, Harry Bryan, suggests northern white cedar, spruce, and ash for optimal weight and strength results. He also offers suggestions for alternate when those are not available. In general, he advises using what is locally available, but warns it might not be as light. For example, northern white cedar is abundant in the northeast US and rare in the rest of the country. People out on the left coast will substitute western red cedar.
While discussing types of wood, this is a good place to mention woods I use for model building. Some model builders like to use exactly the same woods in a model as used in the full sized boat. I don’t. My reason is that most softwoods used in full size boats have large grain patterns that look very out of place when reduced to scale. Many modelers also prefer using basswood because it’s so commonly available and inexpensive. I don’t. It’s too soft for many purposes and can’t hold a sharp edge. Anytime a part will be finished bright, or will need to have very crisp features, I use boxwood. Boxwood has a very fine grain that can be made noticeable if desired and it holds a sharp edge. Cherry is also good, as are swiss pear, yellowwood, holly and purpleheart. For parts that will be painted, I’ll relax a bit and use basswood or maybe aspen. This model uses boxwood for everything except the planking, sheer clamps and carlins. Those are aspen.
 Now, let’s consider reducing lumber thickness to the required size. While this is handy work for hand tools such as scrub planes in full size, we need something a lot more accurate at 1:16 scale. The bottom planks, 9/16 inch thick full size (hereafter 1:1) are 0.035 inch thick at 1:16. The 3/16 inch decking, 1:1, becomes 0.011 inch thick at 1:16. Put another way, 0.011 is 3/4 of 1/64th of an inch. That’s not much thicker than the typical index card or manila file folder material, really thin stuff.
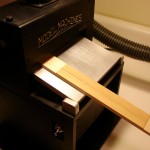
The best tool I’ve found for achieving these delicate results is a thickness sander made by Jim Byrnes of Model Machines. For you 1:1 woodworkers, think of this as a planer that uses a sanding drum instead of rotating knives. We can get to ten-thousandth accuracy with this machine. Yet, the lumber itself won’t tolerate the work forces when very thin. Thinner than about 0.020, the lumber is likely to break when being pushed through. So, I do very thin work by attaching the workpiece to a strip of plywood carrier that’s been milled to a constant thickness. The carrier not only eases the forces on the workpiece, it also helps avoid the “snipe” that often occurs near the ends of workpieces. Rubber cement makes the temporary bond. This first picture shows material for the bottom planks ready to enter the machine.
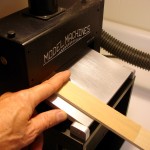 The secret to good results is passing the material through the machine with one steady smooth pass, and doing it the same way every pass. While I can make a carrier of constant thickness, it’s nearly impossible to have one that is absolutely flat. There’s always a small amount of bowing along the length. To counter the bowing, I use a finger (much like a featherboard) right at the mouth of the tool. There’s no safety concern as the mouth is never open wide enough to admit a finger. Then the carrier is pushed smoothly from the end until the workpiece clears the sanding head.
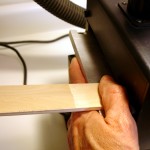 I stop pushing the carrier at that point and switch pressure to the outfeed side so that the carrier can be pushed the rest of the way trough, using a push stick, without engaging the carrier against the sanding head. These steps ensure good results for the workpiece and protect the carrier from accidental dings.
 Lastly, a digital caliper measures the results. I usually pre-calculate the thickness of the optimal workpiece thickness plus the carrier plus a finish sanding allowance and write that down for each piece before I mill it. It’s so easy to keep pushing stuff through the mill until it’s way too thin. Measure once and cut once and you’ll be back for more. The results are so even that I milled all of the lumber for this boat using the carrier technique.
The first milling session produced stock for the bottom, the stems, the carlins and the mid-frame parts, all boxwood. We’ll be seeing pictures of them in coming posts.
Click on any image to show a larger version.
