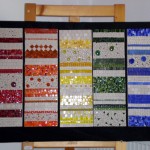
Heidi, our daughter, is a mosaic artist. She displays her artwork at a variety of places and shows, and sometime uses simple easels for display.  We visited her recently and heard her complaining about needing to return some borrowed easels before the current display period ended. What to do? Her mother suggested making more easels and looked my way. … hmmm? … OK.
Heidi and her family live in Austria. Like most homeowners, they have a collection of home fix-it tools that see frequent use, but is not the sort most of us wood workers would intentionally use for a furniture building project. The alternative of retrieving tools from my shop 6000 miles away was a non-starter, as was the idea of acquiring special purpose tools for a single project. Heidi had already determined the style of easel she wanted. My decision was what kind of joinery could be accomplished with the tools at hand.
I quizzed Franz-Georg, our son-in-law, about tools as we drove to the local home center. Having helped him with certain projects at their house before, I knew about most of their tools, but not about the chisels. The “yes, we have one or two” answer made my joinery decision. Goodbye to any joinery more complex than simple half-laps.
Lumber choice was limited both by availability and cost. There might have been a hardwood supplier nearby, but we didn’t look for one, so off to the Borg we went. The Borg stores in Austria are much like here in the US and also use the color orange for their branding. Their lumber selection is similar to ours, but almost twice as expensive. The EU has had “cap and trade” for a number of years already, and it shows in price tags of almost everything. We found some very clear larch for the stiles and fir for the rails, the different wood types limited by size choices (no larch in the smaller size). One of the interesting aspects of their S4S lumber is that when it says 20mm by 80mm, the lumber is actually that size! We carried home a number of pieces 2 meters long, along with a collection of hinges, fasteners, pegs, etc.
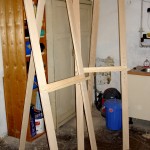
 The easels are very simple, consisting of a rectangular frame for the face, a single leg in the back centered and hinged at the top. The leg extension is moderated by a brass chain that can be hooked into slightly opened eye screws. A simple shallow shelf supports the artwork and is supported by two pegs. The choice of several shelf positions is made available by a series of holes in the face stiles. These two stand 2 meters tall and 66cm wide. The width was determined by a 2 meter length of lumber cut into 3 even pieces. They look good enough to avoid detracting from the artwork, but not fancy enough to overpower the artwork. They are more stable than the loaners Heidi is currently using. Most important, she’s satisfied with them.
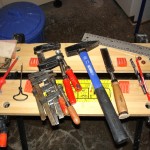
Making them teaches that something practical, useful, and reasonably attractive can be done with a minimal set of tools. I did use a couple of tailed demons. We used the side of a masonry blade in a cutoff grinder to regrind a 25mm chisel. Sort of like a high speed, no-control, two-person (one holds the grinder, the other holds the chisel), Tormek sharpener. 🙂 Having removed the dings and nicks (looks like the kids had been cutting nails with the chisels), the rest of the sharpening was done with sandpaper at 120 and 240 grit. Now you see why half-lap joinery was as sophisticated as I wanted to get. The other power tool was a drill and 10mm brad point bit used for the holes in the stiles.  The photo shows the rest of the tools: a simple square, two dowel points, pencil, brad point drill bit complete with a rubber ring used almost as a depth stop, the wonderfully honed chisel, a hammer, 4 clamps, a gimlet!, a Phillips screwdriver, some sandpaper, and a Workmate bench. A little 8 inch utility handsaw failed to show up for the photo shoot. Too bad we missed it. If one avoided the kink about 3/4 an inch from the tip, some roughly precise laps could be cut, then trimmed with the chisel. I was really delighted to find the gimlet. I used it to make pilot holes for the screws that hold the hinges. One of the best tools in the collection!
 Two sorts of PVA glue were available, “Classic” and “waterproof.” I used the Classic, thinking it likely to be the stronger. I originally considered doweling the joints for added longevity, but rejected the idea on considering how to flush cut the dowels without making an ugly mess of things. Finish consisted of sanding down to 240, edges rounded over, pseudo chamfered, and a few coats of a clear substance similar to poly.
Workroom cleanup fell to the really cute R2D2 shop vac. Unfortunately, he needs a new bag and didn’t suck.
Very cool, Bob!
You show us what a very small tool kit we truly need to be productive – thanks! It seems we lose perspective sometimes, but the gimlet shows the way 🙂
– Al Navas
Ah yes, a vodka gimlet makes a perfect aperitif and nerve-calmer if you’ve spent all morning woodworking with limited tools.
Ben.
I like the way Ben thinks!
… and I’m always envious of his wonderful boating adventures. Find boating enjoyment at “The Invisible Workshop.“