Practice is something often thought of as preparing to do or learning to do. We even have a quotation: “Practice makes perfect.” Then, there are doctors and lawyers. (hmmmm?)
Having been at this lettercarving learning activity for a few weeks now, and not yet carved a complete word, something tells me there could be a very great number of parts to such a series. That is, if I were willing to document all of them for you. I won’t.
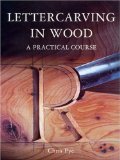
 My virtual teacher is Chris Pye, a British carver of the traditional school. His book, “Lettercarving in Wood: A Practical Course” is the lettercarving “bible” for traditional techniques. His book teaches both incised lettering and raised (relief) lettering. Incised lettering is more exacting than relief by an order of magnitude and consumes the lion’s share of the instruction. Chris’ emphasis in the book is with the traditional / architectural style found originally on Trajan’s Column in Rome.
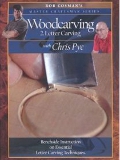
Chris also presents a short version of “All you need to know are 4 techniques” in a DVD made as part of a Rob Cosman series: Rob Cosman Master Craftsman Series “Woodcarving #2 Letter Carving with Chris Pye” DVD. The DVD is very good at showing the actual motions that are sometimes difficult to imagine from words alone.  On the other hand, a DVD can offer us about an hour of illustration, while a book can offer many more hours of detail. If you’re interested in learning these traditional techniques, get both. (Be prepared to wait for the book. The more recent US publication is out of stock everywhere, and Amazon took only three months to get me a copy from the original British publisher.)
The four basic techniques (straight elements, serifs, junctions, circles) are explained and demonstrated on the DVD, but make up 23 lessons in the book. [As an aside, Chris has recently started a new site, Woodcarving Workshops which consists of a growing collection of excellent videos. These videos are self-produced to a very high standard. Instead of long rambling things where one can sit through every single (often numbly boring) cut, these videos are short, clear, and concise. Unfortunately, none cover incised lettercarving and Chris believes he is constrained from producing on that topic by the two previous publications, thinking those publishers might sue should he produces competing material. My opinion is different, that web videos are a new publishing genre. Yet, I don’t know what “exclusive” arrangements he has in his other contracts.]
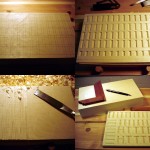
 My practice, so far, is to start with a big thick piece of Heinecke’s northern basswood, 7 inches by 12 inches by 2 inches. Layout some practice exercises (vertical trenches illustrated). Repeat them until I gt the hang of the particular exercise, or the surface is full. Once full, a large #9 gouge hogs off the work, and #6 and #3 gouges are used to level the surface back to something approaching flat. Why not just plane it down quickly instead? Because the gouge technique is also used for lowering backgrounds in relief carving and is a good way to introduce another type of practice. Rinse, lather, repeat, until the board is too thin for further practice. Then, start a new block. There are several hundred letters inside a practice block, all reduced to chips for the compost pile, and to (let’s hope) some modest level of lettercarving skill.
Oh yes, there are pictures along the way, some documenting interesting problem areas. But, you don’t get to see those… (at least not yet.)
Thanks for the review. Looking forward to more installments.