Some of the furniture I wanted for my new shop was a decent pair of sawhorses. I skipped the Workmate era a few decades back, and haven’t changed my mind since. I don’t want sawhorses that pretend (poorly) to be workbenches, and don’t actually work very well for sawing. Nor did I want the usual utility horses that are almost completely useless for sawing.
The answer that caught my eye was a sawbench designed by Christopher Schwarz, editor of Woodworking and Popular Woodworking magazines. 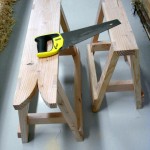 It differs from the utility horse by having a broader top, a surface that can be used to hold lumber more firmly than on the edge of a two by four. A good sawbench supports a wide variety of hand sawing tasks. Christopher offers free construction drawings for a sawbench and a companion horse, both the same height
Christopher also conducts classes about constructing them. Now, one would think that they’re pretty straightforward and may not need a class. That was my first thought, and not being near one of his class locations, I decided to set off on my own. That’s when I discovered a few of the things not covered on the drawings are:
- how everything is fastened together
- the best assembly sequence
- how to be really good at the joinery.
The first puzzle, fastening, was fairly simple, especially after seeing screws mentioned in a blog entry. I don’t know what Christopher uses, but I opted for #10 by 1 1/2″ countersunk screws. Assembly sequence sorted itself out, although I’m not sure I found the most efficient sequence. Got them together! The real enlightenment was about joinery. There are a dozen joins in each bench, each needing somewhat accurate sawing. Part way through the project, it dawned on me that those classes are really all about developing good hand sawing techniques, not about building sawbenches! The sawbenches were just fodder for sawing practice.
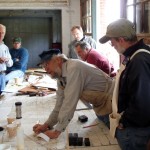
While I’m fortunate to be able to learn a lot of things on my own, classes can be invaluable in two regards. They can convey advice on how to master skills competently, and by necessity they’re full of the advice you never find in books: how to recover from mistakes. The absolute best thing about the class at Wooden Boat School was learning from mistakes, those I made and those I watched others make. In that sense, a class is a “mistakes concentrator” that packs plenty of learning into a short time.
Slogging on without that advice, my joins gradually improved. By trial and error I learned the correct stance, (as in the Using a Sawbench article), what workpiece positions worked best for specific types of cuts, and how to be more accurate. Since I had to discover those things on my own, the learning might stick, but I’m sure there are lots of things I didn’t learn.
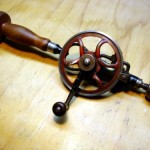 As an aside, these horses were built using hand tools exclusively except for the curved rip notch which I cut with a band saw. The wood is Douglas fir, direct from the home center, hand planed down to the specified dimensions. All joins were hand sawn. Drilling and fastening was done with my 1896 Goodell-Pratt cordless drill.
The results are a pair of horses that work very well. Don’t look too closely at the joins. They’re good enough for this kind of project and the gaps will soon fill with sawdust.
